Recently Completed Project
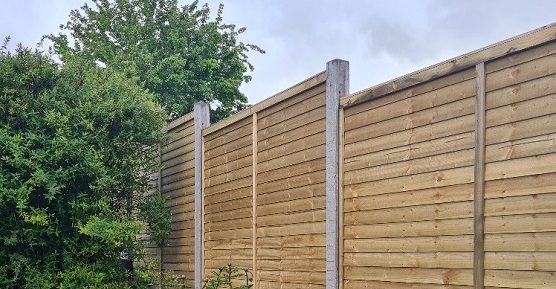
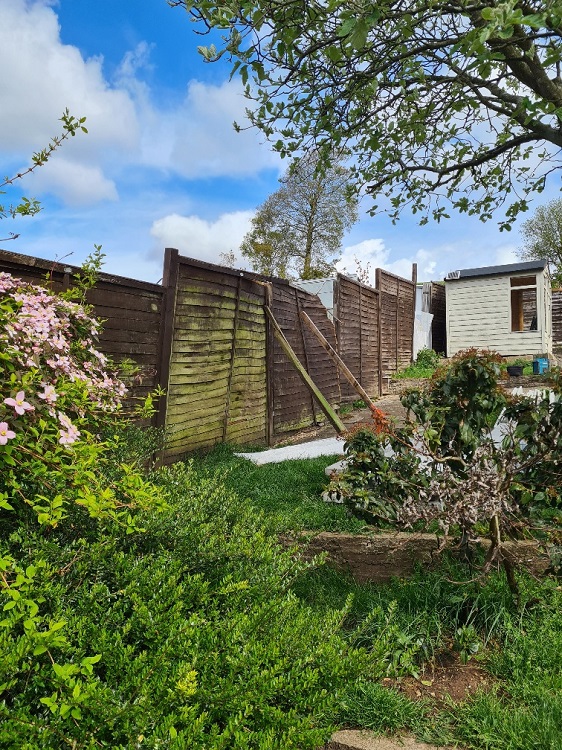
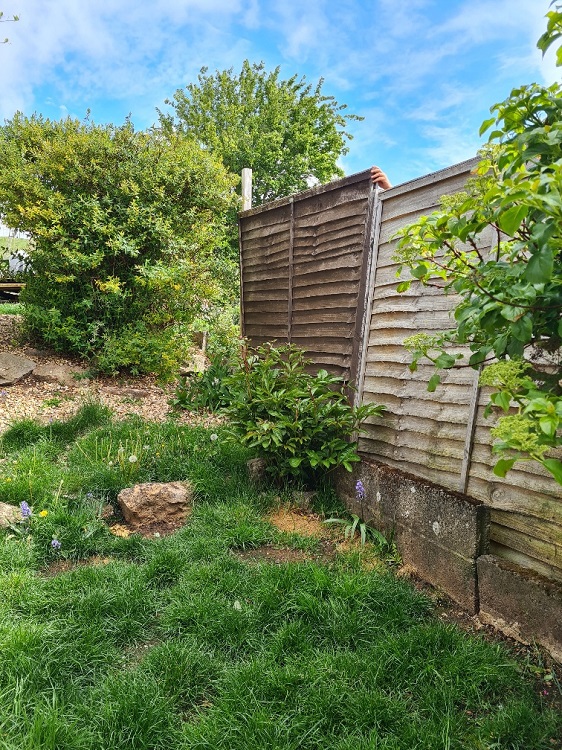
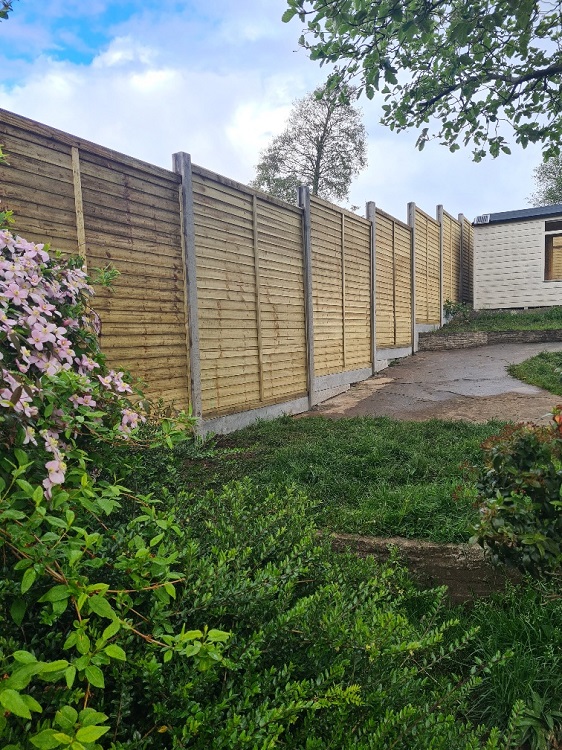
We were called out to replace a very old and damaged fence, after clearing away the old broken fencing we replaced it with pressure-treated lapped panels on concrete slotted posts with 6inch concrete gravel boards.
The end result is stunning. See below for before and after photos.
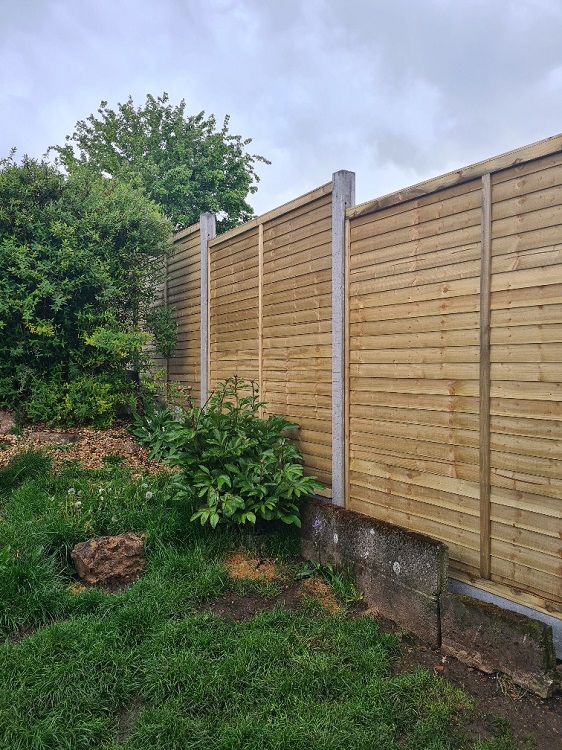
Pressure-Treated Lapped Panels Replacement
Replacing pressure-treated lapped panels is a crucial task for maintaining the integrity and appearance of your fencing. These panels are a popular choice due to their durability and aesthetic appeal, making them a staple in many gardens and properties. Here is a comprehensive guide to understanding and replacing these panels.
Why Choose Pressure-Treated Lapped Panels?
Pressure-treated lapped panels are renowned for their enhanced durability and resistance to the elements. The pressure treatment process involves impregnating the wood with preservatives, which helps protect against rot, decay, and insect infestation. This makes them an ideal choice for outdoor use, ensuring longevity and reduced maintenance.
Signs That Replacement is Needed
Over time, even the most robust panels can show signs of wear and tear. It is essential to regularly inspect your fencing for the following indicators that replacement may be necessary:
- Rot and Decay: Despite treatment, prolonged exposure to moisture can lead to rot.
- Warping or Splitting: Weather changes can cause the wood to warp or split, compromising structural integrity.
- Insect Damage: Look for signs of insect activity, such as holes or sawdust.
- Loose or Missing Panels: Panels that have become loose or are missing can affect the overall stability of the fence.
Steps for Replacing Lapped Panels
- Assessment and Preparation:
- Begin by assessing the extent of the damage to determine how many panels need replacing.
- Gather the necessary tools and materials, including new pressure-treated lapped panels, nails or screws, a hammer or drill, and a level.
- Removal of Old Panels:
- Carefully remove the damaged panels, taking care not to damage the supporting posts.
- Dispose of the old panels responsibly, following local regulations for waste disposal.
- Installation of New Panels:
- Position the new panel between the supporting posts, ensuring it is level and aligned with existing panels.
- Secure the panel using appropriate fasteners, ensuring it is firmly attached to the posts.
- Finishing Touches:
- Once all panels are replaced, inspect the entire fence to ensure stability and uniformity.
- Apply a protective sealant if desired, to enhance the longevity of the new panels.
Maintenance Tips
To extend the life of your pressure-treated lapped panels, regular maintenance is key. Here are some tips to keep your fencing in top condition:
- Regular Inspections: Check for signs of damage or wear at least once a year.
- Cleaning: Remove dirt, algae, and moss build-up with a gentle wash.
- Re-sealing: Consider applying a wood sealant every few years to provide additional protection from the elements.
By following these guidelines, you can ensure that your pressure-treated lapped panels remain a durable and attractive feature of your property for years to come.
Need help with your garden fencing?
Call us today to book your FREE quote: Tel: 07988 733 972

